Saturday, July 26, 2014

Inside the new cabinet.

Do you wanna see the inside of this cabinet? I'll show you a few ideas I had to make the best use of space. 


This is now my sewing cabinet. 


 I have multiple drawers in the other cabinets around my craft corner so I wanted to make sure everything I needed for sewing was in one spot. I put rubber grip feet on the bottom of two of my nice divided trays and moved them onto the keyboard pull out. The rubber grips work really well at keeping the trays from shifting.
  

Next up was the disk sorters. I couldn't remove them but I didn't want that to be dead space. I nightmared about that before I even had the cabinet. I cut some chipboard the proper width and re-wrapped all of my ribbon. 


Then I added some more foot grips at the back of the slide spots so the cards had a stop point to keep them lined up all pretty at the front. 


Nice Huh?  I am so excited about this. It is right where I can see it all and it is, of course, color organized. 


I bought a couple of file boxes at Ikea and painted them the proper color. Then labeled them (because without labels its easy for things to loose their home). Now my beads and paint are nicely placed in those boxes. 

Next up, Stamps. I have a bunch from over the years. I wanted to make a specific spot for them. I needed it to fit in the cabinet but didn't want them sliding out of stacks every time I opened the slide out shelf. I purchased some thin wood and some corner braces. 

Then turned them into a box. 


 Added some divide pieces and made it all fit within the framing of the slide out. 

I am so thrilled with how this turned out. I can see the stamps and they are in a very confined storage. 


The middle slide out has become a spot for card making. It's a bit random, but its all right there. 

Over all I am so happy with how this turned out. I sorted my whole room to make sure it all had very definite zones for my different crafts. 

My current project is Cosplay. I talked the hubs into dressing up with me for the next Salt Lake ComiCon.  Working on our costumes for that. I may have already set a record for un-picking.   


Computer cabinet

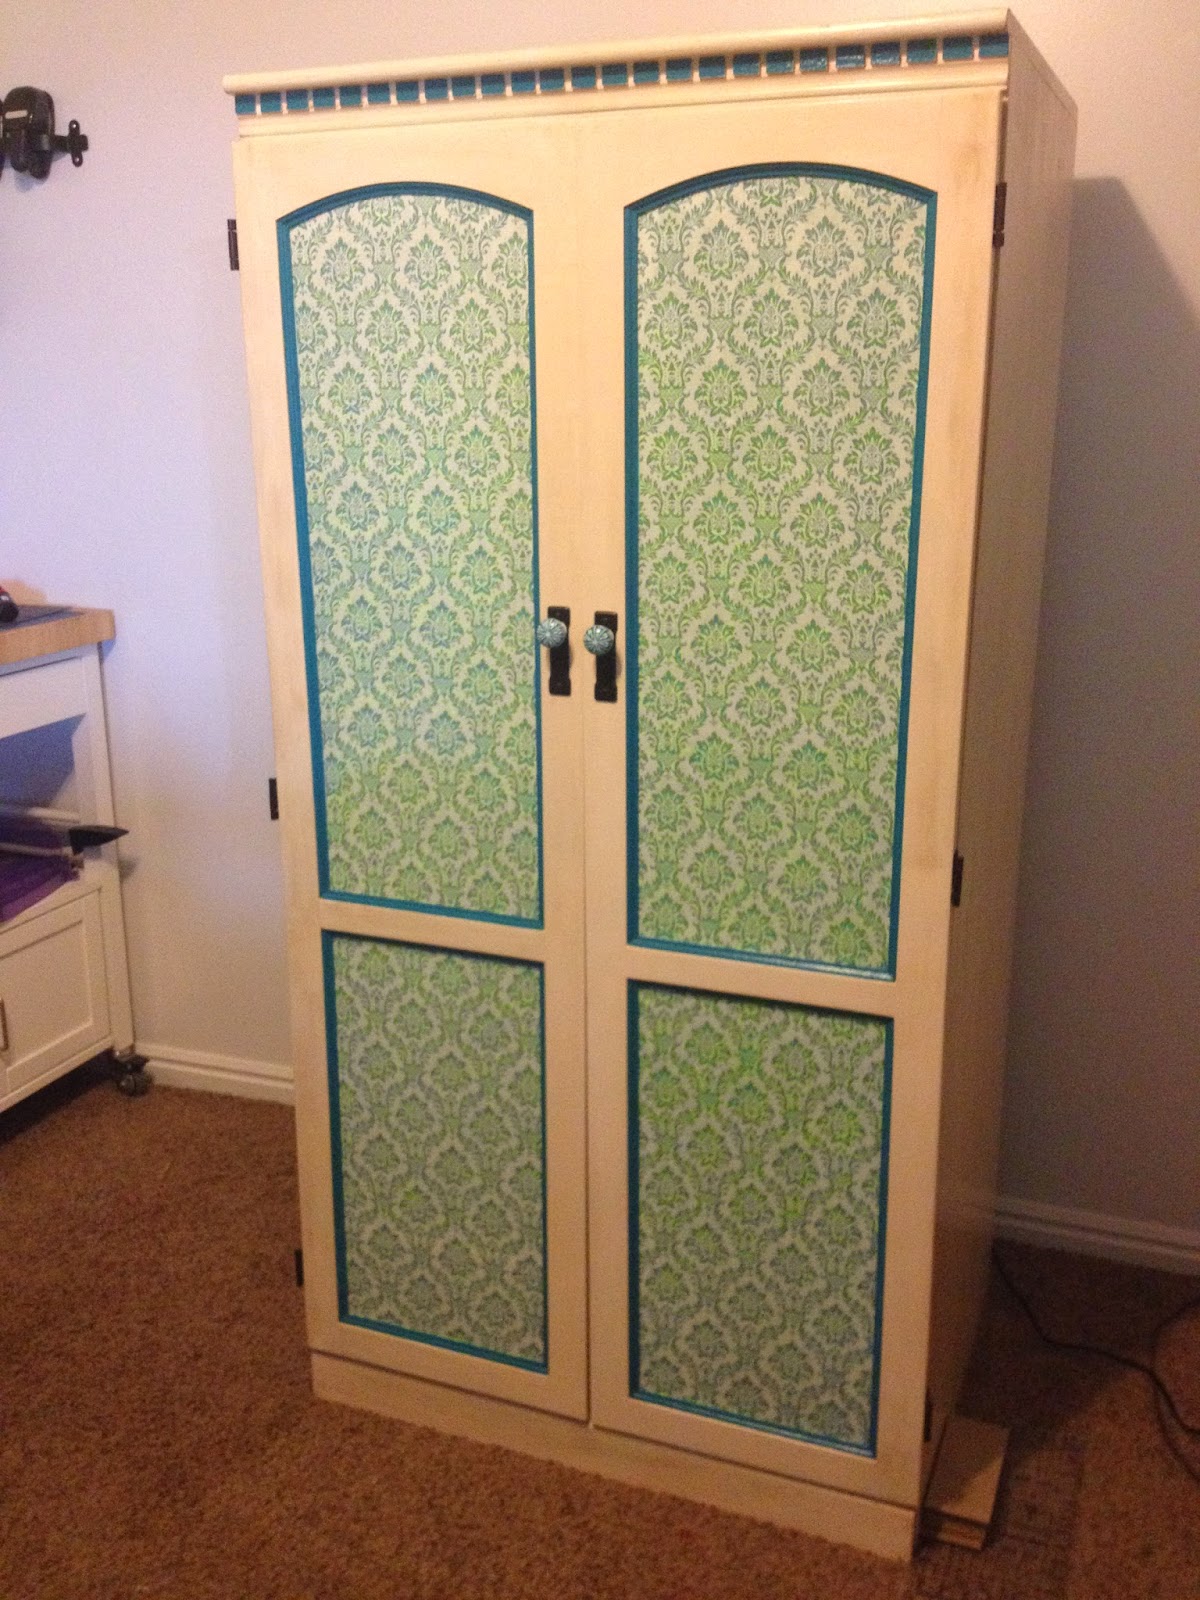
This ended up being one of my main projects. After helping my wonderful friend move, I was given this baby.

I didn't really need it for a computer but I knew I could narrow down some of my craft stuff into a smaller cabinet. Of course I need every inch to count. So there are a few fun ideas to come in another post.   

 Since I can't always leave well enough alone I did a little makeover. 


As I painted this I realized I need to step back from turquoise (not happening just yet). I have had a bit of turquoise in my craft space for almost 9 years now.  It still works. I was going to paint the whole inside but realized that would get overwhelming and might throw me off when working with colorfull fabric so I decided to use it more as an accent. 


I bought a roll of cork and glued it into place. It's quite thin so my pins won't stay in. I plan to add another layer. I have a magnet strip from Ikea that will go on the other door. (I recently found a magnet strip at Harbor Freight for much less, it's lighter in weight too). 


I spray-painted the hinges, just because.


I then found some wonderful knobs at Hobby Lobby. I ended up with the painted white detailed one at the bottom of the photo.  


I'm sure I saw the idea on Pinterest but I liked the color/pattern in the back. I debated how I would do it and settled on fabric. I kind of dig it. 


I liked the fabric on the back so much that when I wasn't liking the plainness of the front doors, I added some fabric there too. 


Doing this project made me really clean out my craft stuff. I have been collecting things for years. I made sure I really wanted the item before it was given a home back in my craft space. 

As I said above, every inch needed to be useful so I had to come up with some ideas to best utilize the space. That post will be coming soon…

I swear...

I really will get it in here before two more months have past… 


Tuesday, June 17, 2014

Side Table Repurpose

Did you think I forgot all about this blog?  I just haven't had much to add lately. 
Now I have a few items that will be posted on tuesdays over the next few weeks. 
I still have no actual followers and that's sad. So, if you like my updates click the follow button. 

It will make me feel special. 

Somewhere along the way I got this table "hand me down".  It is nice, very heavy and kind of annoyingly big. Its 2feet x 2feet so it is a big side table thats hard to decorate. I have wanted to do something with it to make it more useful.  

In my usual nighttime thought / overthink I decided it could make a nice ottoman. 


 I measured down the legs and decided it could loose about 7" 

Then I bought some thick, firm foam from the local Smiths Market place and cut it to fit the table top.


I am not so great at sewing. But I'm too stubborn to let that stop me. Because of that I have found my own ways to simplify the process for myself (or I'm totally doing it right and I am awesome :-) 

I laid the fabric wrong side out over the foam and pinned the excess corners to create a seam line, flush to the foam corner so that it would be square to the 2 inch foam. I took that to my sewing machine then turn the fabric right side out and stuff the foam back in to the stitched fabric leaving the excess fabric to staple to the top board. 

 The top was never really mounted to the base so I stuffed the fabric through and stapled it down to keep the top and bottom pieces together. 


  Excuse the green curtain lighting. in the next shots while you check out my cool new foot stool.


I knew I wanted a very large, graphic print. 
I am loving it. 
Because of the firm foam you can still set things on it without them tipping over. But it also serves as a foot rest or even extra seating if needed. 


It was quite a simple update to do and I think it will be far more useful in our house. 

thats it for today. Come back next week. I'll show you my new kitchen table. 

Friday, April 11, 2014

SteamPunk Goggles

Did you start to wonder if I had forgotten about this blog thing? 

This next weekend is the Salt Lake ComiCon, Fan Expo. We have spent the past week working on costumes but nothing really blogable. 

Except maybe this. 

My oldest daughter is doing a sort of Steam Punk Snow White. For her head band she wanted a pair of goggles. Now comes the part where I reference the wonderful Epbot.com.  http://www.epbot.com/2011/07/how-to-make-steampunk-goggles.html

Yes. I use her site ALL the time. I couldn't have made this had she not shown me the way. 

However, I made these once using metal pipe like in her directions and realized they were going to be too heavy for a headband. This is my adjustments for a lighter end result.
These are the items I bought.
2 - 1 1/2 die cast slip joint nuts (@$2.50 each)
#4 mini clamp. ($.40)
1 1/2 " PVC slip joint coupling. ($6.00) 

The coupling comes with plastic joint nuts but they're ugly and not the right shape 
for the look we were after. So just toss those. 
There are metal couplings as well but they add so much weight. I found some to purchase by themselves that were lighter. They were in a high box at Lowes. Not something you will just notice but if you watch for 1 1/2 die cast slip joint nuts you will spot them. 

 See how they have the grip corners around the edge. 

I then found a leather looking fabric at walmart. I think I bought 1/4th yard. 
I cut it to about 1 1/2" wide then sewed the edges down. 

Next I used a scrap of paper to determine the shape of the fabric eye piece. I placed it in the ring to determine the length. 

Then cut the paper to scoop like this. I know it's not even or perfect. It evened out in the stitching and seems to have worked fine. 


I used it as a pattern to cut out the fabric. Then I stitched the edges and connected the ends. I didn't take a photo of the pipe but I used a dremmel tool to cut it in half. I used a slight angle so they would have a scoop to match the fabric. Then glued the fabric to the pipe.
 

Next I wanted to find a good size for the screws. I took a photo of the drawers to maybe help.  
I wanted really small screws which are only available in stainless. 


I bought 2 tiny screws (0-80 x 1/4 flathead + hex nuts) I drilled holes in the shorter, inside of the tubes then attached the spray painted mini clamp for the nose piece. At the deeper end of the tube I drilled through the fabric and the head strap then placed 2 larger screws (4-40x1/4 Pan head +Hex nuts). I worried about the length but it ended up being perfect. 


Some spray pain on the nuts. 
We used Rust-oleum Metallic in Flat Chestnut. Screw on the pipe ends

And thats it. Steam punk Goggles. It really was a fast project. 


For the "lenses" we used Vellum but I don't like that you can't see through them at all. My daughter is fine with it since it is a headband. I think I would use a matte finish page protector or a thick plastic folder. 

So If you are at FanExpo and recognize the goggles, say Hi. 
I'll be the mom behind her in the Molly Weasley sweater.  


Yesterday was my birthday. I finally got my own finishing sander which is Great because I have 4 wood projects taking space in the garage and I'm about ready to get back at it.  

Have a wonderful week.  

Thursday, March 6, 2014

Star Wars Lego Table.

My Son likes to set up the counter of his Lego sets to look like their proper environment. He has used blankets and fabric before. One of his cool ones was when he used Lincoln Logs and glue 
dots to make the Forbidden Forrest for his Hagrid's Hut set. He decided this week that a 
Star Wars set needed it's own location. 
A dessert scene for the Skiff, Jabba's Barge, and Sarlacc Pit.

 So part of being my child is coming up with crazy ideas and asking me to figure out 
how to make it work.  

Yesterday after school child and I went to the local thrift shop and found this table. He liked that it had a raised edge. He also liked the shape until he got home and tried to fit it in his room. 


You can faintly see a red X on the top. I measured from corner to corner to locate the center and pulled out the dremel tool. Using all the wrong attachments, I carved out the center. To get it just a bit deeper I chiseled out some particle board layers with the putty knife and screw driver 


Once I got a decent depth I grabbed this nifty spray paint that has a sandy texture to it. 


After one spray I realized it wasn't going to fully cover the existing wood so I went searching for what paint I had kicking around.


 I found a dark brown and a creamy white. Neither color really worked SO I mixed them. I just needed a better undertone so the color wasn't crucial. 


You can see the base coat is a bit streaky. I did't want a solid, perfect layer. We are going for sandy  and the more texture I could add in, the better. It isn't even the same tone across the top. I added a little more brown half way through and didn't mix thoroughly. 
(breaking All the rules) 


I then sprayed a layer of the gritty paint but still wanted texture. I found some acrylic paint in 2 more shades of brown, diluted the light one with water and flicked it across the top. I then added the darker into the water and flicked some more. 


But I felt like it was a little too speckled so I added one more thick, puddled layer of texture paint. (thick sections are thicker "sand spots")  


When the boy returned from school and saw this he decided that it could be darker and that he wants the pit to sit deeper so I borrowed a scroll saw and am wondering why I didn't do that sooner. I got 2 paint stir sticks (free) and nailed them to the underside of the hole. 


 then one more time I diluted craft paint and flicked it over the top, pounced the color spots to fade out and add depth. Thus making the boy happy.  


And here is his set on the sands of Tatooine.


Just a silly thing that makes a kid happy.


I have been low on posts. I am working on a few projects that aren't really photo friendly. Like family history and sorting through all of my Mom's slides that she doesn't know I stole while she was gone recently (hi Mom) 
A little info on that. Costco slide transfer is usually $17.99 for the first 50 and .29 each after that. This month they are having a $5.00 off deal. Which means I Really need to pull it together.  

Have a good week (or month, who knows)